This Device Was Reset To Continue Sign in With a Google Account Previously Synced on This Device
Remove Previously Synced Google Account from Android
Android users typically have a Google account associated with a smartphone. This is very useful, but if you want to remove this and use another one, that might require some work. Keep reading to find out how to remove previously synced Google account from Android in a few steps.
The first thing you need to do when you get a new Android smartphone is to set up a Google account. Everything you do on your device will be preserved on this account – history of researching, passwords, orders from favorite restaurants… Also, you can use Google account as your default Android backup location or emergency storage for an important note.
However, it may happen that the previous owner forgot to remove the Google account when the phone changes owners. That's why it's very useful to learn how to remove the previously synced Google account from Android. Besides, be ready to perform this action whenever you are getting rid of your old phone or getting a used device from someone else.
Remove Previously Synced Google Account from Android
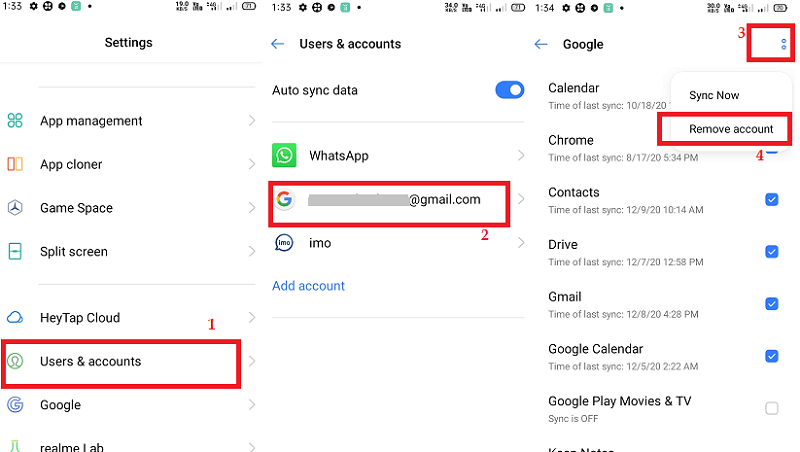
The easiest way to remove an account from the device is to deactivate FRP – Factory Reset Protection. There are possibilities to delete the previously synced Google Account before a factory reset. Just follow the steps listed below to quickly accomplish:
- Visit Settings and then Accounts. There you can see a list of all accounts synced to your phone, including accounts for social media.
- If you have several Google accounts, choose the one you want to remove. Click on the Remove account button.
- Confirm the action you want to take if the system requires it.
Remove Previously Synced Google Account from Android
Another viable method is to disable the sync feature for Google account and avoid losing content and messages. This will allow you to use another account in the primary role on the phone. While this won't erase any existing data, it will prevent new notifications and messages from the old Google account from appearing on your phone. Here is how you can execute this option:
- In the Settings menu, navigate to Accounts and tap on it.
- Choose which account you want to disable from the Android from the list of options.
- Click on Sync Account, and you will see all Google features synced. Check them all to completely turn off syncing.
Remove Previously Synced Google Account from Android after Reset
If your phone has already been factory reset, then the factory reset protection will be activated. Because a hard reset will certainly delete all of the data you kept on the Android phone and allow you to start clean. However, when you try to turn on the phone, the system will ask you to enter Google account details for verification. And, you will get to the screen that says "this device was reset to continue, sign in with a google account that was previously synced".
To get around this obstacle, you can first try to directly remove the previously synced after reset with DroidKit – a complete Android solution. It allows you to bypass FRP and remove Google accounts on all Samsung phones & tablets. It can get the previous Google Account removed completely, so you can unlock your device and log in to another Google account to enjoy all Google services.
DroidKit now supports the latest AndroidOS 12. And, you can get the tool to bypass Google account from your Windows PC or Mac.
Here are the detailed steps:
- Install and open DroidKit on your PC. Choose FRP Bypass mode.
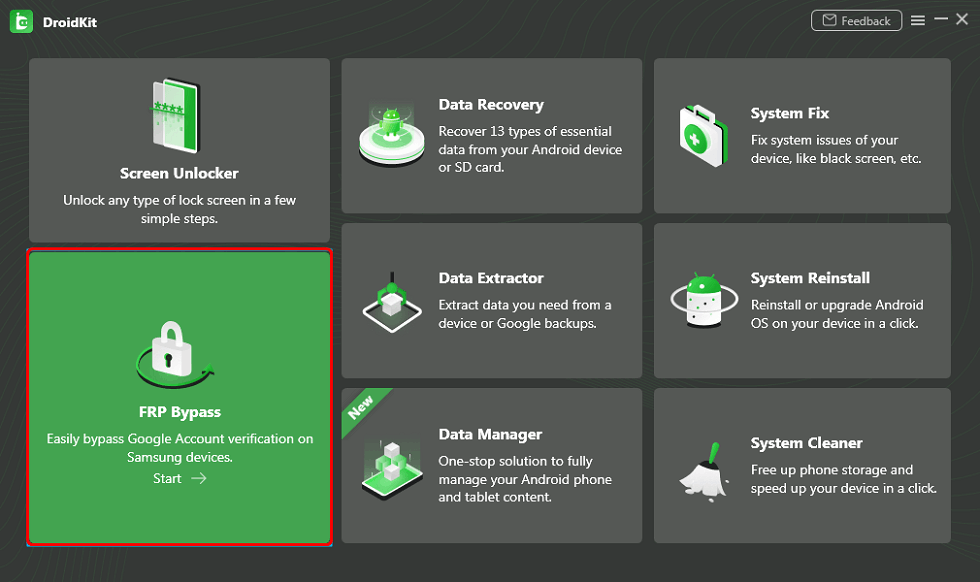
Choose FRP Bypass
- Connect your phone and head to Start.
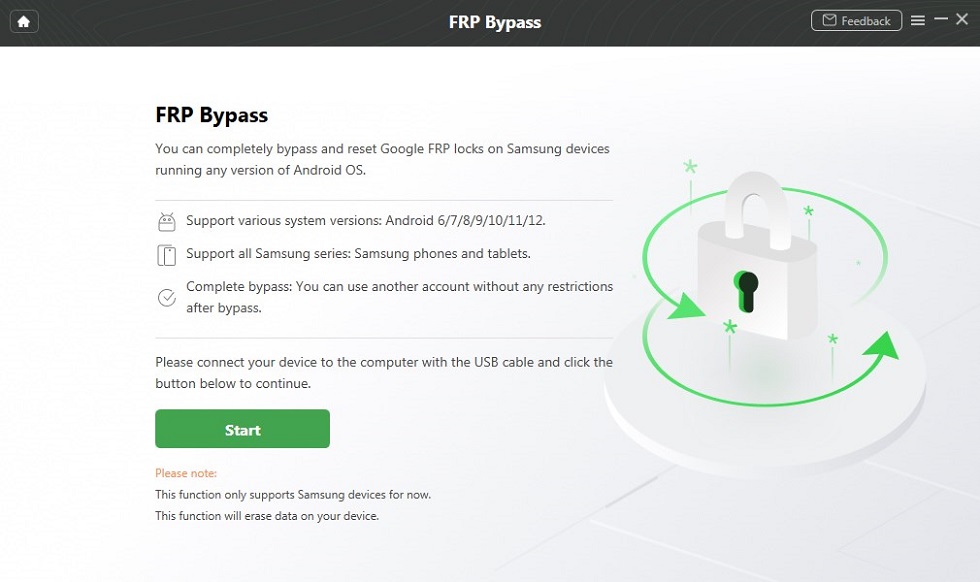
Connect your Device and Start
- Wait for the configuration file prepared. Then put your phone into recovery mode to get your Android system version, and click Download Now button to get the matching firmware.
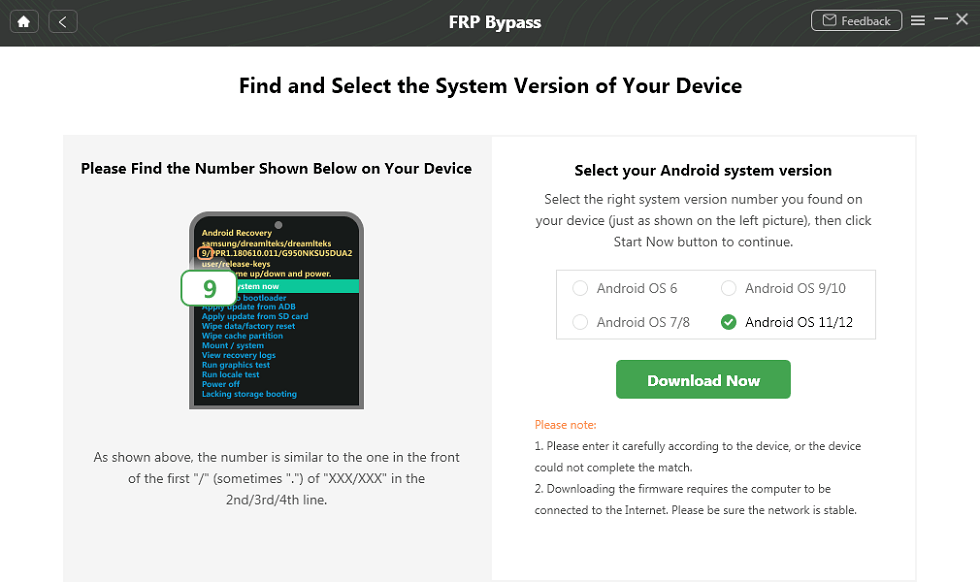
Select Android System Version
4. Follow the on-screen instructions to Wipe Cache Partition and settings. After the steps, the device will be restarted and the FRP Lock is also removed successfully.
Recover your Google Account Information
The easiest way to get around Google verification is to get the password used for the previously synced account so that you can deactivate it. You can ask the previous owner to send you account information, or you can try using a third-party app to recover password for the Google account. When you get the account information, you can get past the verification step and then use one of the methods for removing a synced account described above.
Further Reading: How to Bypass Android Lock Screen without Google Account >
Remove Previously Synced Google Account byOEM Unlocking
OEM unlocking is a security feature for Samsung devices. You can use it if you want to root or unlock the bootloader of your smartphone. It can also be a solution for the account verification issue on a freshly reset device. Here is what you need to do to remove the associated Google account with this method:
Step 1: When the system asks you to verify your account, you need to tap and hold the @ character to get the Settings menu. Choose Google Keyboard Settings from the menu.
Step 2: Click on the button with three dots at the top-right corner and select Help & Feedback.
Step 3: In the Help section, choose Using Google Keyboard. Tap and hold this option, and select any text on this page, then click on Web search in the upper right corner.
Step 4: A search field will appear on your screen. Delete the text inside the field and type Settings.
Step 5: Scroll until you find About Phone.
Step 6: Select Build Number and tap seven times on that button. In this way, you will enable Developer Options.
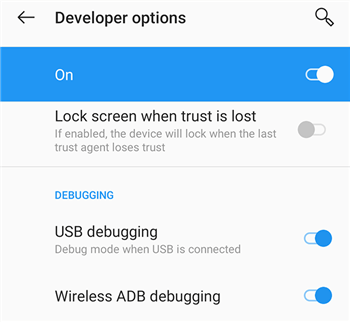
Activate USB Debugging on the Phone
Step 7: Return to the previous menu and open Developer Options.
Step 8: Allow OEM unlocking feature on your phone.
Step 9: Restart your Samsung and connect it to WI-Fi.
Step 10: The system will ask you to add a new Google account.
By activating OEM unlocking, you can completely remove the previously synced Google account and gain complete control over your device, so you can set up a different default account and password.
Further Reading: How to Fix Odin Complete(Write) Operation Failed >
Conclusion
You have a wide range of options at your disposal if you need to remove a synced Google account from an Android phone. DroidKit is one of the effective ways to remove the old Google account even if the device has been reset to factory settings and you can't get past the initial screen. Choose the most appropriate approach based on your circumstances and your level of technical knowledge.

Source: https://www.imobie.com/android-unlock/remove-previously-synced-google-account-from-android.htm
Post a Comment for "This Device Was Reset To Continue Sign in With a Google Account Previously Synced on This Device"